本篇文章给大家带来的内容是关于php在web服务器上的运行模式详解,有一定的参考价值,有需要的朋友可以参考一下,希望对你有所帮助。
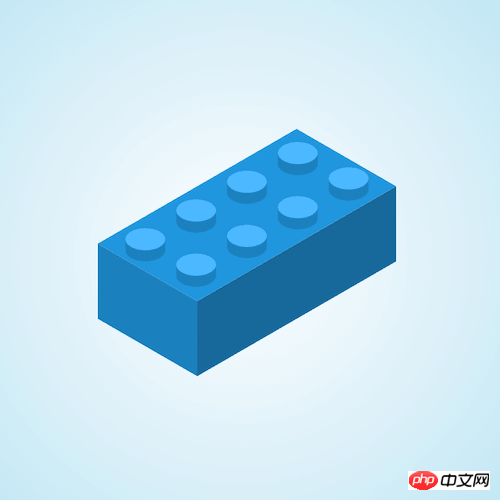
效果预览
源代码下载
https://github.com/comehope/front-end-daily-challenges
代码解读
定义 dom,容器中包含一组 3 个面:
居中显示:body {
margin: 0;
height: 100vh;
display: flex;
align-items: center;
justify-content: center;
background: radial-gradient(circle at center, white, skyblue);
}
定义容器尺寸:.brick {
width: 40em;
height: 30em;
font-size: 10px;
}
画出积木的正面:.brick {
position: relative;
}
.sides .front {
position: absolute;
width: 9em;
height: 6.8em;
background-color: #237fbd;
top: 19em;
left: 7em;
}
画出积木的右面:.sides > * {
position: absolute;
background-color: #237fbd;
}
.sides .right {
width: 18em;
height: 6.8em;
filter: brightness(0.8);
top: 19em;
left: calc(7em + 9em);
}
画出积木的顶面:.sides .top {
width: 18em;
height: 10.4em;
filter: brightness(1.2);
top: calc(19em - 10.4em);
left: calc(7em + 9em);
}
把以上 3 个面组合成立方体:.sides .front {
transform-origin: right;
transform: skewY(30deg);
}
.sides .right {
transform-origin: left;
transform: skewY(-30deg);
}
.sides .top {
transform-origin: left bottom;
transform: rotate(-60deg) skewY(30deg);
}
接下来画积木的凸粒。
在 dom 中增加 8 个凸粒元素:
定义变量:.studs span:nth-child(1) {
--n: 1;
}
.studs span:nth-child(3) {
--n: 3;
}
.studs span:nth-child(5) {
--n: 5;
}
.studs span:nth-child(7) {
--n: 7;
}
.studs span:nth-child(2) {
--n: 2;
}
.studs span:nth-child(4) {
--n: 4;
}
.studs span:nth-child(6) {
--n: 6;
}
.studs span:nth-child(8) {
--n: 8;
}
画出左侧的凸粒:.studs span:nth-child(odd) {
top: calc(4.6em + (var(--n) - 1) / 2 * 2.6em);
left: calc(23.3em - (var(--n) - 1) / 2 * 4.6em);
}
画出右侧的凸粒:.studs span:nth-child(even) {
top: calc(6.9em + (var(--n) - 2) / 2 * 2.6em);
left: calc(27.9em - (var(--n) - 2) / 2 * 4.6em);
}
最后,画出凸粒的顶面:.studs span::before {
content: '';
position: absolute;
width: inherit;
height: 2em;
background-color: #4cb7ff;
border-radius: 50%;
}